

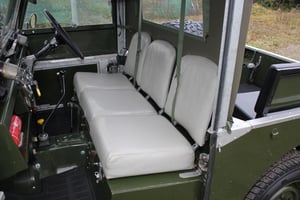
There’s nothing quite like the inside of a rugged Defender or Series I, II or III, whether it’s the...
.jpg)


If you’ve got a Defender with a winch, chances are you’re no stranger to mud, steep inclines or a bit of rough terrain. Whether you’re greenlaning across the British countryside or you just like knowing that you’re prepared for the worst, a winch is a brilliant tool - especially if you know how to use it properly!
Here we’ll take you through the basics of using your Defender’s winch - from attaching and operating it safely, through to correctly winding it back in…
What does a winch do, and why might we need one?
A winch is a mechanical device mounted to the front (or occasionally the rear) of your Defender, designed to pull your vehicle out of sticky situations like bogs, ditches or uneven ground. It can also be used to recover other vehicles or move the odd heavy obstacle. Powered either electrically or hydraulically, most winches use a steel cable or synthetic rope wound around a drum, which pulls in under load when activated.
Usually, people tend to use their Defender’s winch mainly for vehicle recovery - especially when off-roading, for one of the following reasons:
Getting unstuck from sticky situations
The most common reason is to recover the Defender when it’s stuck in mud, sand, snow or on uneven ground. If your wheels are spinning and traction is gone, a winch gives you a controlled, powerful way to pull yourself free without relying on another vehicle. Even if you rarely use it, having a winch fitted gives you a bit of extra reassurance. You know that if something goes wrong far away from any help, you’ve got a way to get out on your own, especially when mobile signal is patchy and there’s no one else around.
Helping others
Winches aren’t just for your own vehicle. Many drivers use them to recover other stranded vehicles, move fallen trees from trails, or assist during emergencies. Really, they’re a great go-to tool in any off-road recovery kit.
Tackling tough terrain
The weather and the terrain we experience can sometimes change fast. What starts as a dry lane could become a slippery mess after a downpour of rain. A winch ensures you’re prepared for those unpredictable moments.
In essence, winches are about self-sufficiency, safety and being prepared for the kind of adventures that Defenders were built for!

Most winches on a Defender tend to be mounted at the front of the vehicle. That’s because they’re primarily used to pull the vehicle forward out of trouble, whether that’s from mud, snow, steep slopes or ruts. Pulling forward is generally considered safer and more controlled than reversing out of a sticky situation.
Why are they usually at the front?
You can see what’s ahead and steer more accurately by having it at the front. Driving forward offers better traction and control once you’re free, too. Most recoveries involve moving onwards, not going back the way you came, and many aftermarket bumpers and recovery setups are designed specifically for front winch mounting.
Can you fit one at the rear, though?
Yes, you can. Some experienced off-roaders also fit rear-mounted winches, particularly those who tackle extreme trails or go on solo expeditions. A rear winch allows you to recover backwards if going forwards isn’t possible, or to help recover another vehicle behind you. On serious expedition vehicles or in competitive off-roading, some vehicles even have both front and rear winches for maximum recovery flexibility.
For most Defender owners, though, a front-mounted winch is all you’ll likely ever need - and it’s the most practical option for everyday use and a bit of greenlaning or off-roading.
Attaching your winch
Before operating your winch, you’ll need a secure recovery point - ideally, a sturdy tree or another vehicle with a proper recovery hook. Here’s how to attach it:
1. Wear gloves – especially if using a steel cable, which can fray and cause injury to your hands.
2. Disengage the clutch for the purpose of allowing the cable to spool out freely.
3. Pull out the line – walk the hook to your chosen anchor point, keeping tension in the line to avoid any tangles.
4. Use a tree strap or recovery strop around your anchor, and attach the winch hook using a correctly-rated shackle.
5. Double-check everything – make sure the hook is secure and the cable isn’t kinked or snagged.
It's a good idea to also place a winch damper over the middle of the cable as this helps absorb energy if the line breaks, hopefully preventing damage to your Defender (or more importantly, you).

Winching your Defender out
Once you’re attached, here’s how to begin recovery:
1. Engage the clutch on the winch.
2. Start winching slowly using the remote or switch, keeping an eye on the tension and line feed.
3. Stay outside the danger zone – no one should stand anywhere near the winch line while it’s under load.
4. Use the accelerator sporadically, only if needed, to assist the winch without overloading it.
5. Keep an eye on your battery – electric winches use a lot of power. Don’t let your Defender die mid-recovery!
Once you’re free or your recovery task is complete, stop the winch, secure the vehicle, and start the rewind.
Rewinding the winch
Rewinding your winch properly is vital to prevent any damage and to ensure it’s ready for next time.
1. Disengage the winch and unhook the line.
2. Keep light tension on the line as you slowly winch it back in — this helps it spool evenly.
3. You can guide the line by hand (carefully!) wearing gloves, making sure it winds neatly across the drum but keep your hands well away from the mechanism.
4. Stop with the hook just short of the fairlead, and secure it to a proper mounting point (not your bumper or suspension components!).
5. Don’t just let the winch rip it in - that’ll damage the rope or cable, or even the winch itself. Take your time, keep it neat, and your winch will be ready to go again next time.
.jpg?width=1000&height=750&name=shutterstock_2408094149%20(1).jpg)
The winch is a serious bit of kit, but with the right know-how, it can be an absolute lifesaver sometimes. It’s a good idea to practice using it before you actually need it, and always follow the correct procedure - and remember to take your time!
There’s nothing quite like the inside of a rugged Defender or Series I, II or III, whether it’s the...
If you are doing the usual tyre checks on your Defender, it’s important not to forget one more -...

These days, being able to check a vehicle’s MOT history has never been easier. Whether you want the...